
Docs
Install DeepSeekBot
Import the public npm plugin in DSH, enable Bot mode and create a PersonaBot.
Version scope: current-source guide. These steps include UI updates absent from npm v1.1.0; older test packages and screenshots are historical verification records. See Connections and optional tools for release and component boundaries.
Install the DeepSeekBot plugin in DeepSeek Harness (DSH), enable it and create your first PersonaBot. You install one product package; Core, Client and the qualified IM Provider arrive with it.
This guide installs the public npm package deepseekbot, verified with DSH 0.2.0-rc.1. Screenshots show a clean Profile using the Chinese DSH interface; the captions name the corresponding controls. No repository checkout or local build is required.
1. Open Plugins
Start DSH and open its Web interface. If DSH is not installed yet, follow the official DSH getting-started documentation. Follow API and Bot model setup to configure a provider first; after creating the Bot, choose its models under Model in the DM's Channel sidebar.
Click Plugins (插件) in the left sidebar, then Add plugin (添加插件).
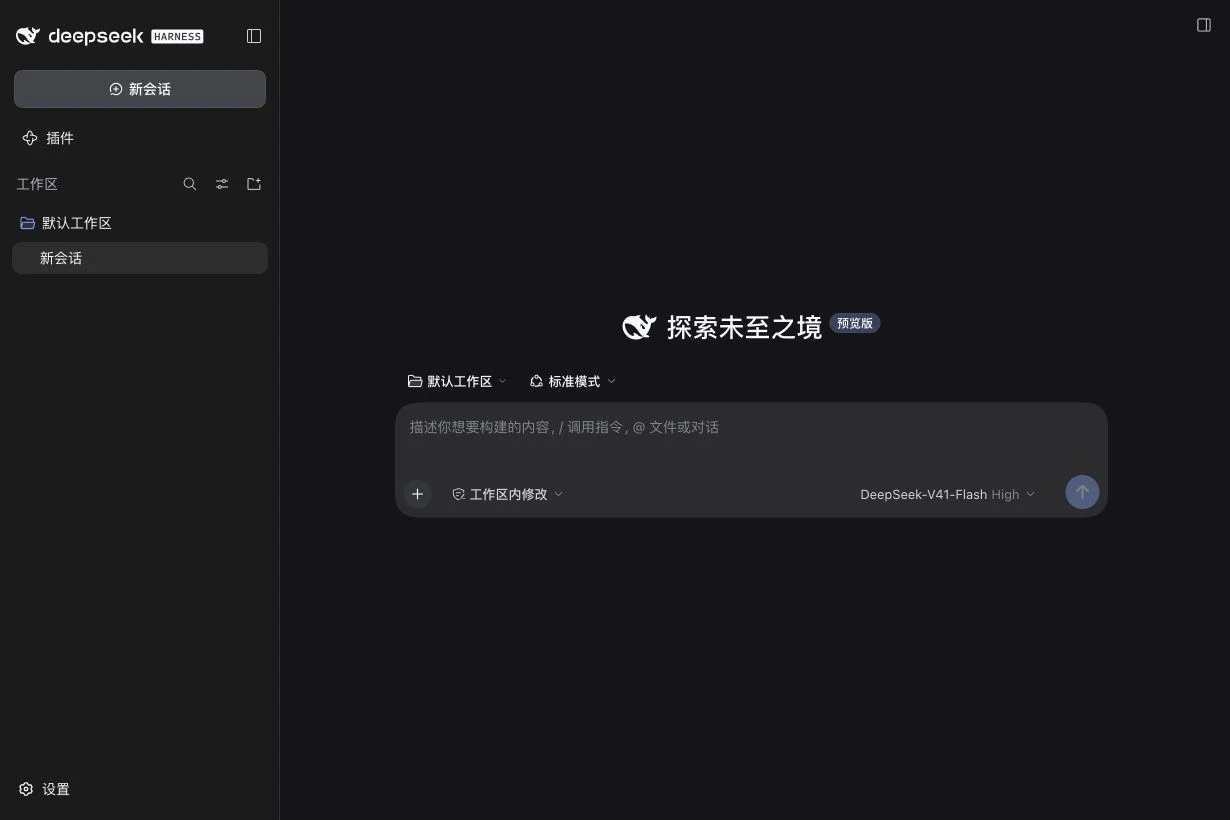
2. Enter the public package name
Paste this exact value into Package name or address (包名或地址):
deepseekbot
Keep npm official registry (npm 官方源) as the installation source and click Install (安装). Wait for the installation task to finish.
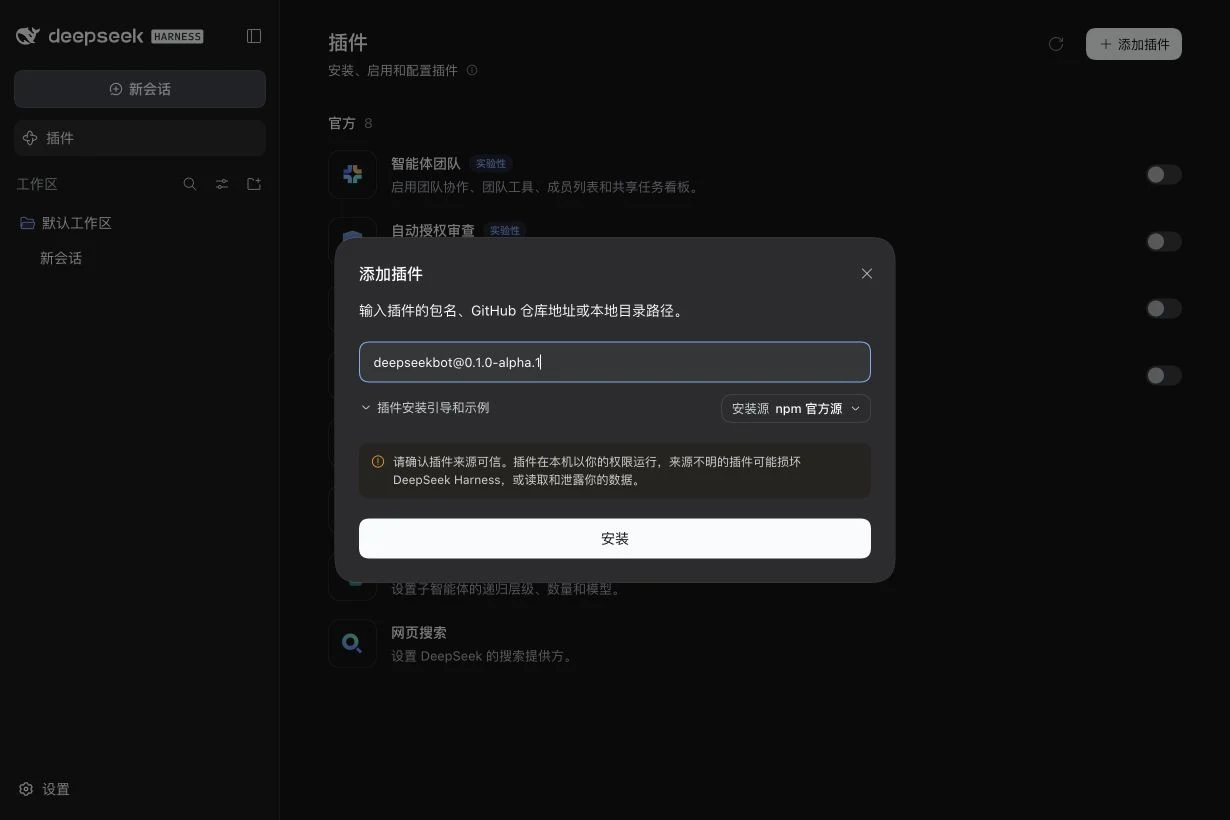
This field imports the package source. It is not a file-upload picker. The package name alone installs the latest release (the screenshot shows an earlier pinned version); add @<version> to pin one.
3. Enable the installed plugin
The completed task shows Installed (已安装), the package name and the installed version. Click Enable now (立即启用). If you closed the task, return to Plugins and turn on Enable deepseekbot (启用 deepseekbot).
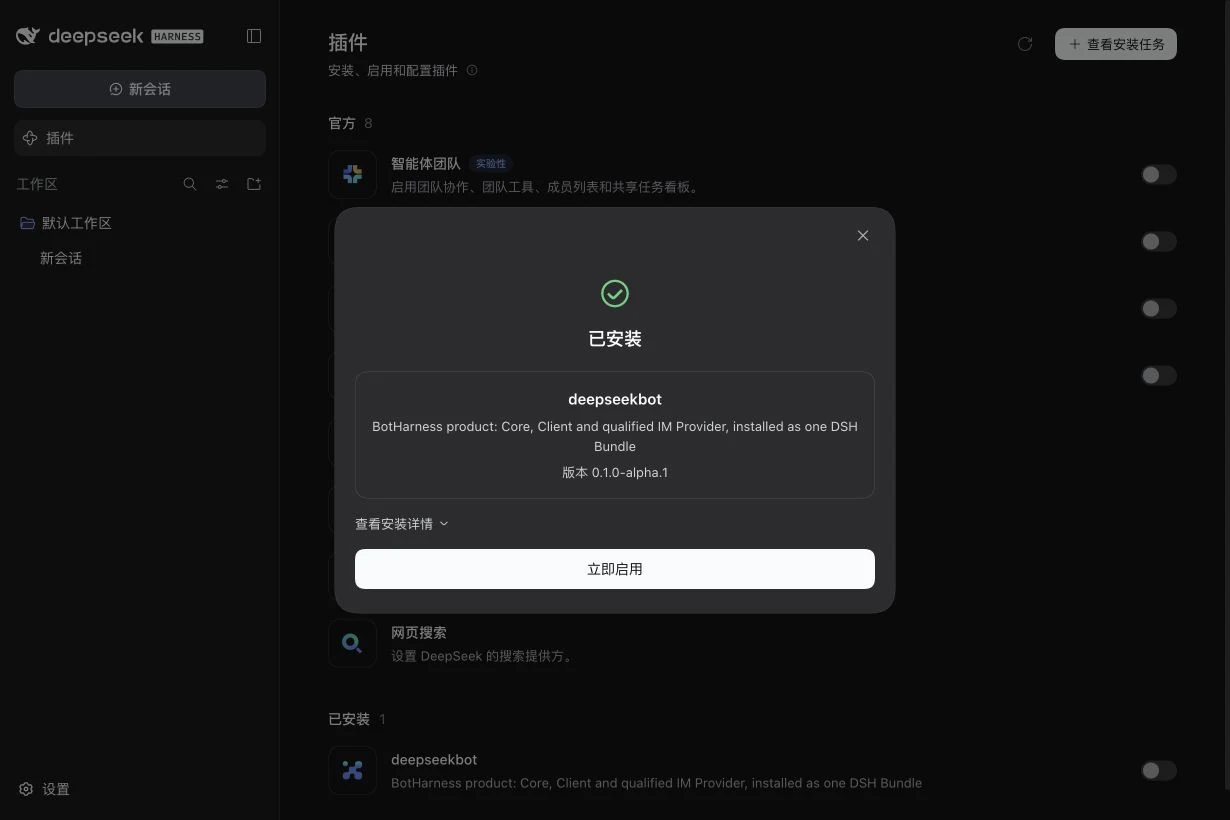
Once enabled, Bot mode (Bot 模式) appears in the sidebar. In the verified RC1 setup it loaded immediately. If your DSH reports that a restart is required, restart the same DSH Profile and reopen its Web page.
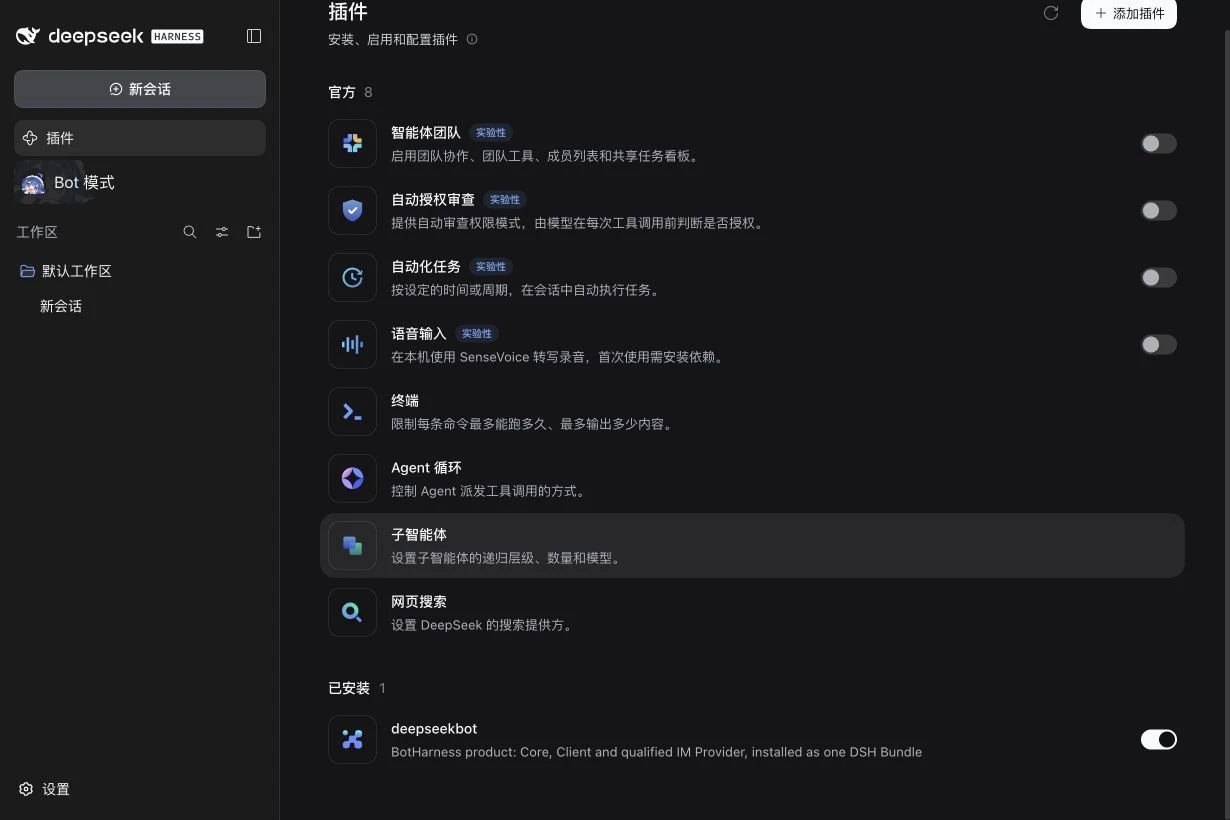
4. Open Bot mode
Click Bot mode (Bot 模式), then Create your first PersonaBot (创建第一个 PersonaBot). Enter a name and click Create (创建); role and description are optional.
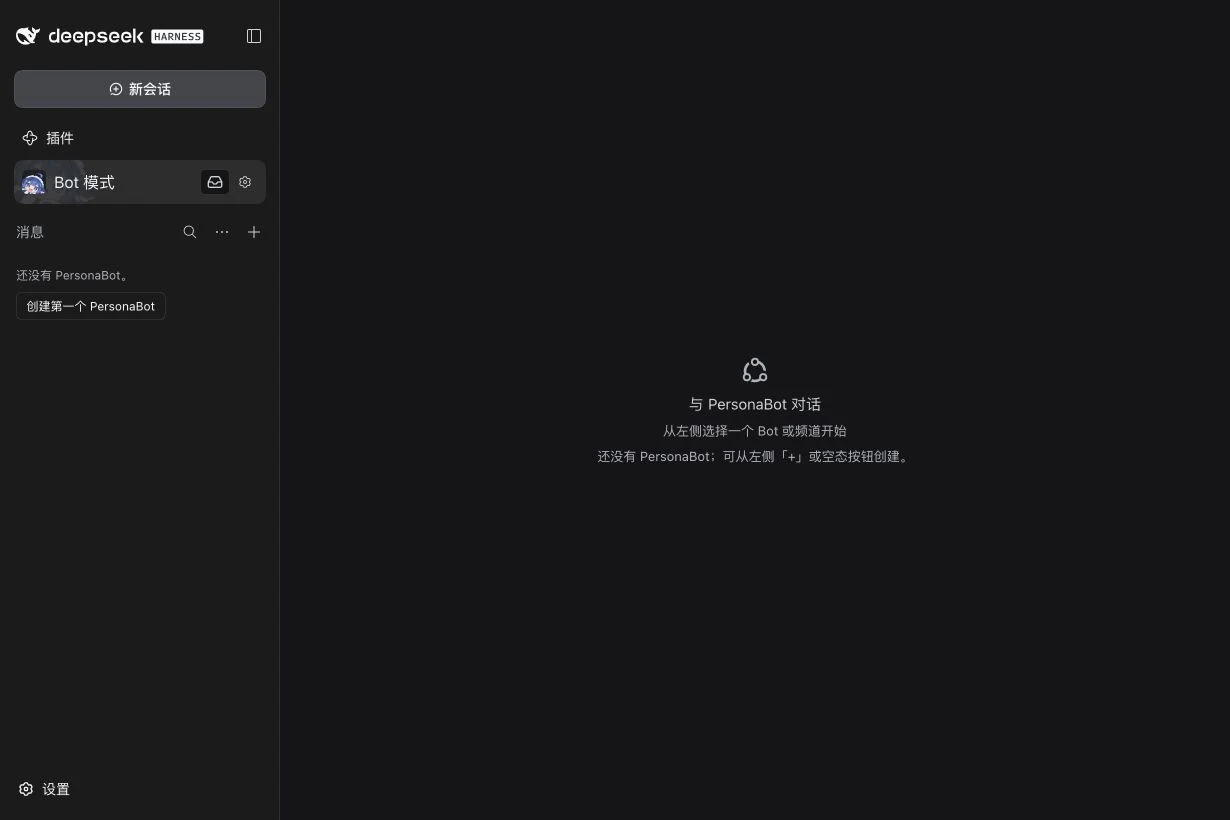
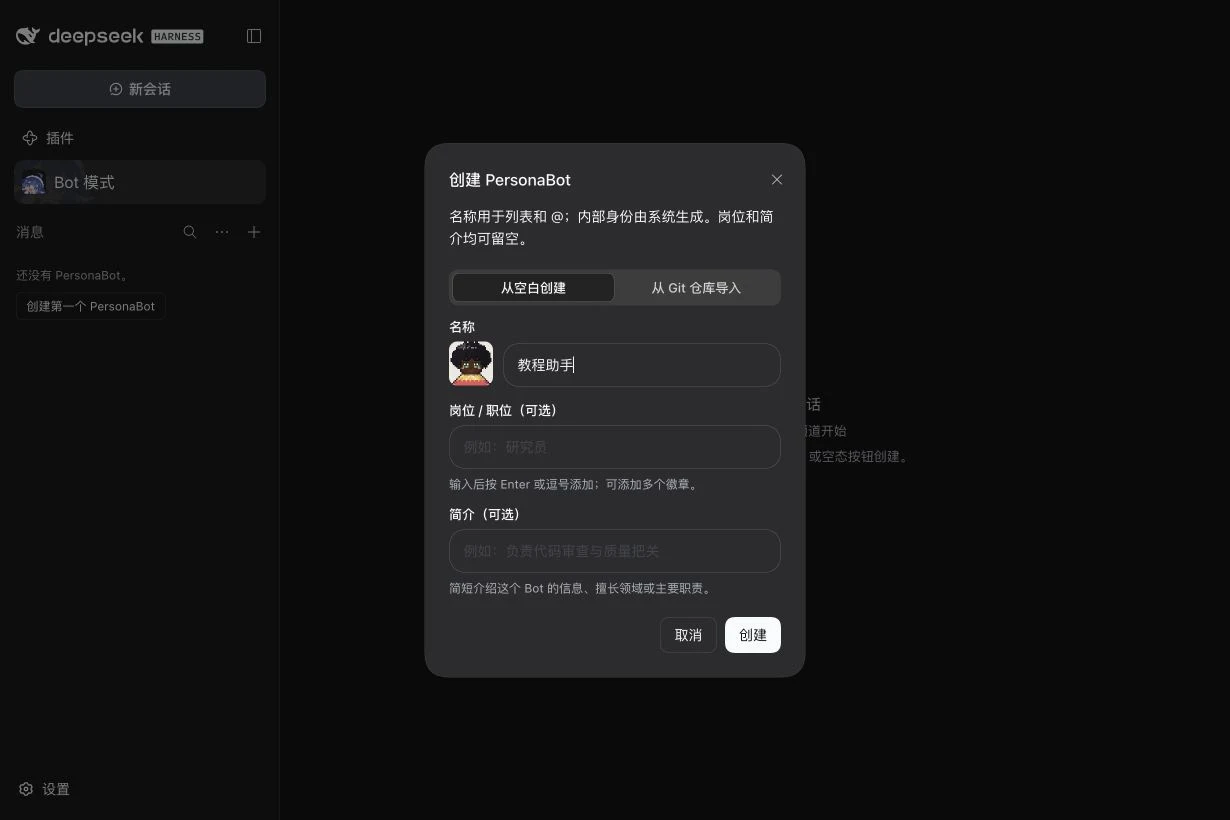
Open the new Bot's DM, expand Model in the Channel sidebar on the right and click Main model. Choose the main model and task model, then Save. See API and Bot models for all fields. Return to the DM and send a short greeting. A reply verifies that your model is usable as well as the plugin being enabled. Model credentials are configured in DSH; npm installation does not provide them.
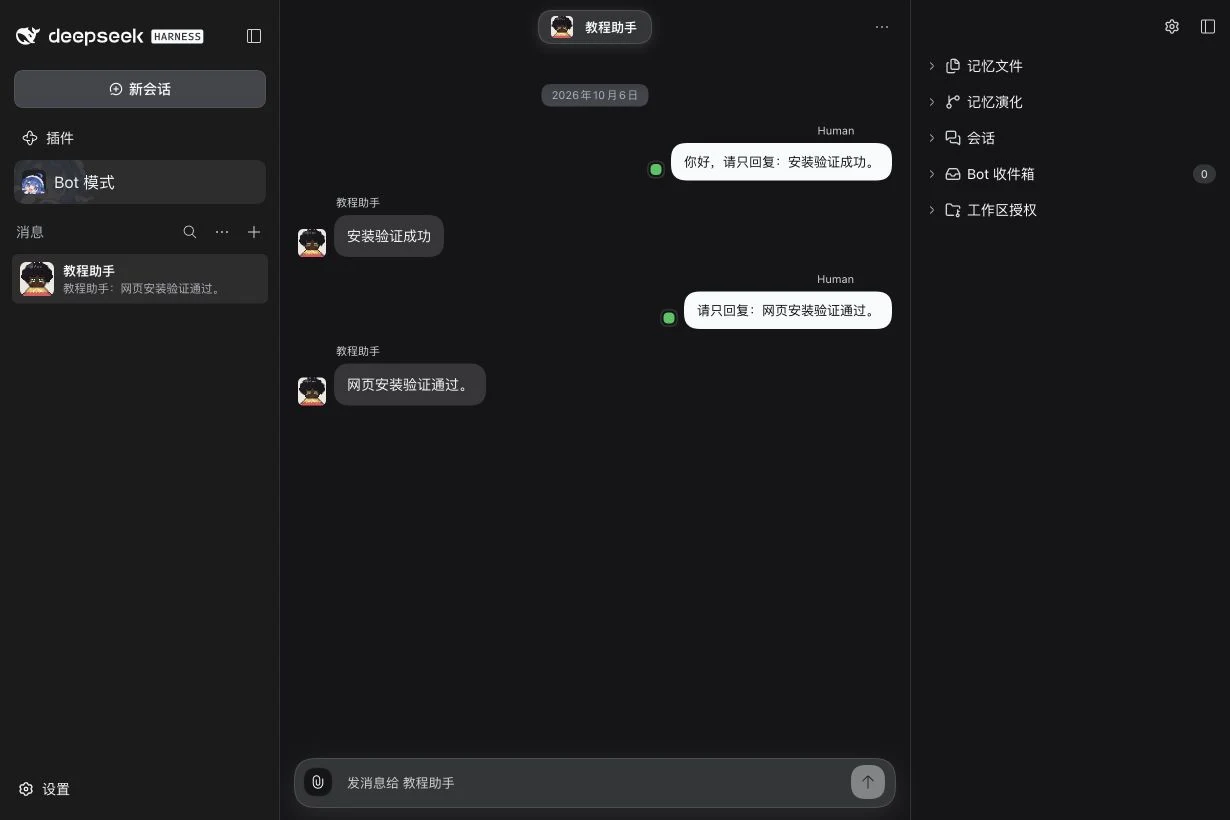
The verification Bot answered a message sent through the Web DM after installation and a cold Host restart. Messaging app accounts remain disconnected.
See Settings guide for appearance, concurrency, persona, attention, sidebar, and workspace authorization fields.
5. Connect a messaging app
The initial installation has no connected IM accounts. After a local DM works, use Connections and optional tools to choose a platform, check your version and bind an app. Current source binds in the DM sidebar’s External identities; new conversations can be automatic or ask first, without per-group Profile authorization.
Git
Bot mode needs Git 2.28 or newer on the computer that runs DSH, because each Bot's memory is a Git repository. When Git is missing or too old, Bot mode says so at the top of the roster and turns off creating and importing Bots until Git works.
The quickest fix is the Install Git button in that notice. It downloads a portable Git (about 65 MB) into the DeepSeek Harness data folder, checks it against a pinned checksum, and starts using it right away. It needs no admin rights and does not change the Git installed on your computer. DeepSeekBot downloads it from media.botharness.ai first and from GitHub if that fails. A usable system Git always takes priority, so installing Git yourself later replaces it on the next DeepSeek Harness start.
To install Git yourself instead:
- macOS: run
xcode-select --installin Terminal and follow the prompt, or install Git with Homebrew (brew install git). - Windows: install Git for Windows with the default options.
- Linux: install the
gitpackage with your distribution's package manager, for examplesudo apt install git. Ubuntu 20.04 ships Git 2.25; use the git-core PPA for a newer one.
After installing it yourself, restart DeepSeek Harness and click Check again in Bot mode.
The Git row in DeepSeekBot settings shows the Git version in use and whether it is your system Git or the Managed Git.
When you import a Bot from an SSH address such as git@github.com:owner/repo.git and the Host has no SSH key for it, DeepSeekBot retries once with the matching HTTPS address and tells you it switched. The Bot then syncs over HTTPS. Addresses with a custom SSH port are not converted.
Other installation methods
The official DSH packaging reference also supports CLI installation into a named Profile:
dsh plugin --profile <your-profile> add deepseekbot
Use the Profile you actually start. Enable the plugin in that Profile's Plugins page afterward.
To import the same precompiled archive, download the public npm tarball with npm pack deepseekbot, which saves deepseekbot-<version>.tgz in the current directory. In the Web interface, enter its absolute path on the machine running DSH in Package name or address; a path on a different browser machine is not a Host path. With the CLI you can instead use dsh plugin --profile <your-profile> add ./deepseekbot-<version>.tgz from the download directory.
If installation does not finish
| What you see | Next check |
|---|---|
| Package or version not found | Check the exact package spelling and version, choose npm official registry and retry once registry metadata is available. |
| Installed but no Bot mode | Enable deepseekbot in the current Profile; follow any DSH restart notice, then reload the Web page. |
| Bot mode works but the Bot cannot reply | Check the selected model and DSH credentials; installation and model access are separate. |
| IM settings are empty | Add the app account through the connection guide; an empty account list is expected on first installation. |
For source development rather than installation, see the repository README and local development guide.